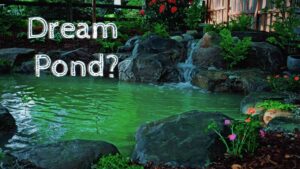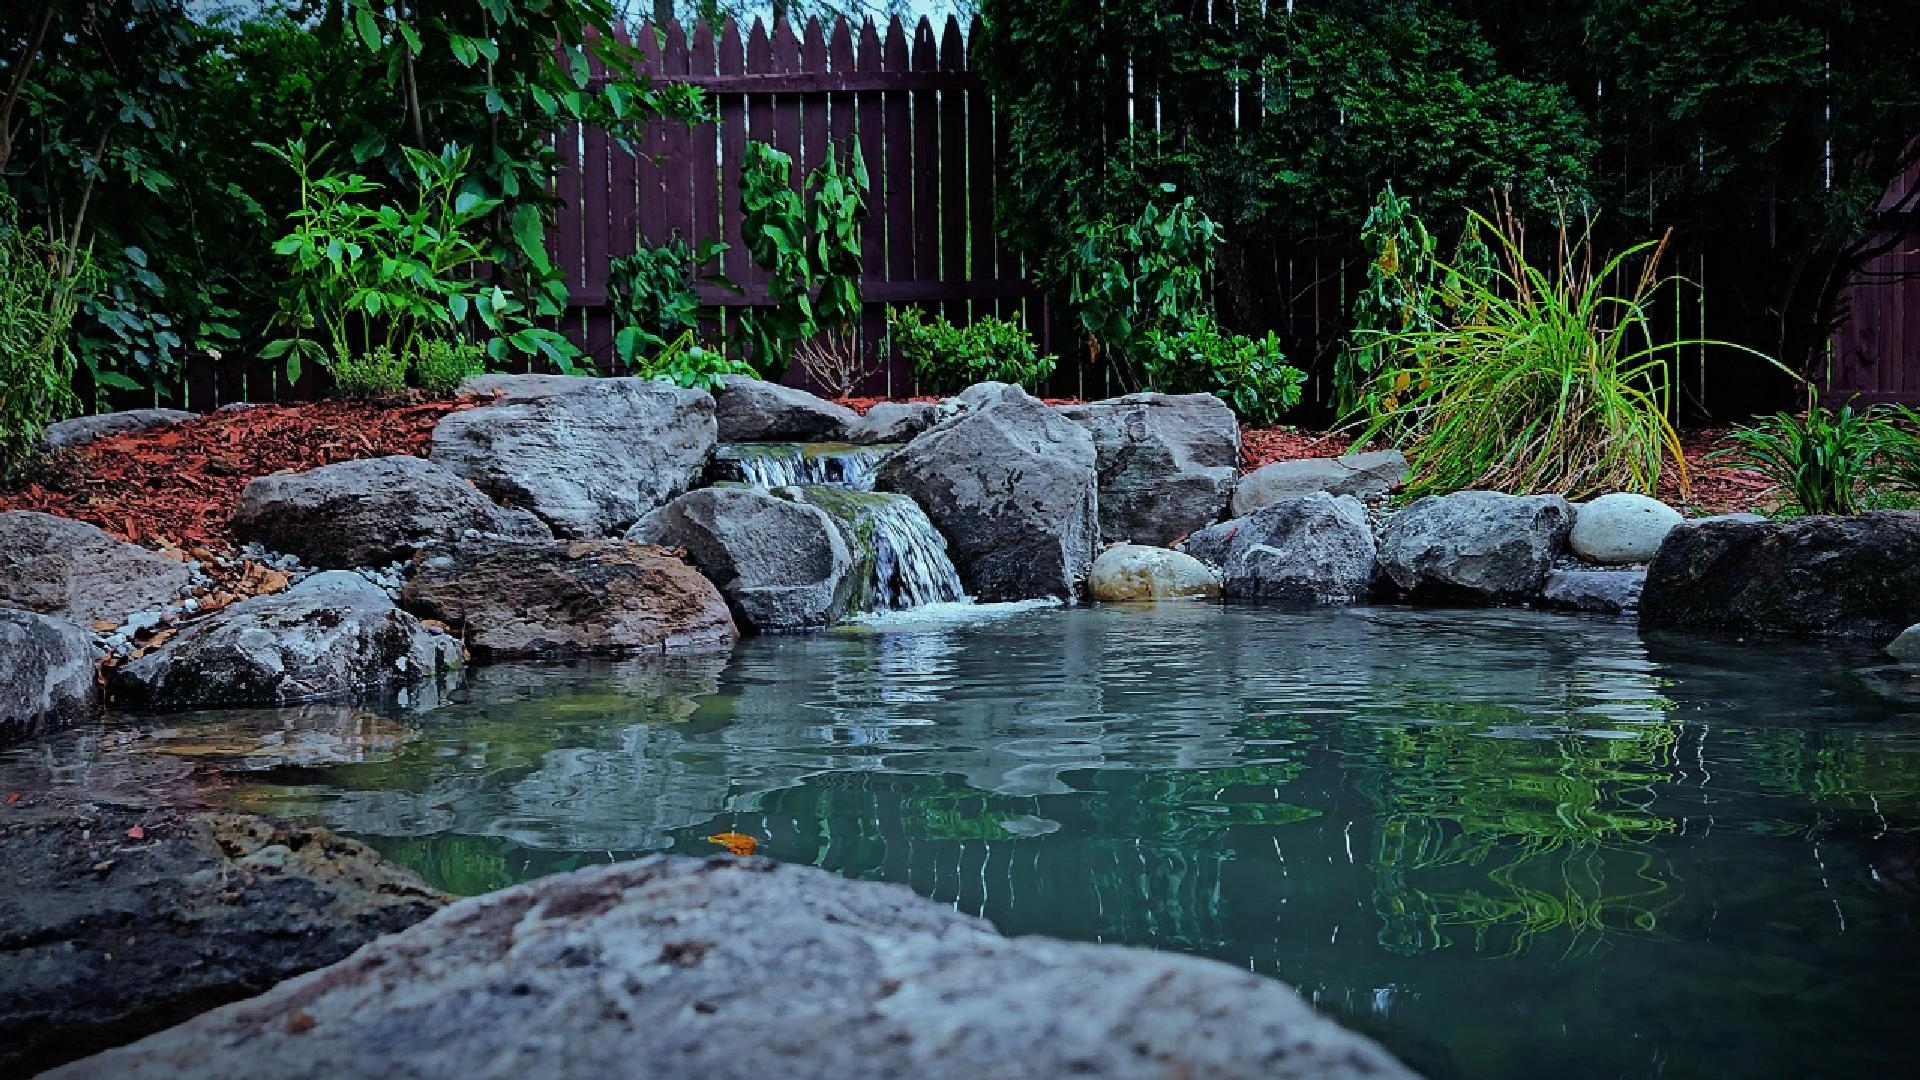
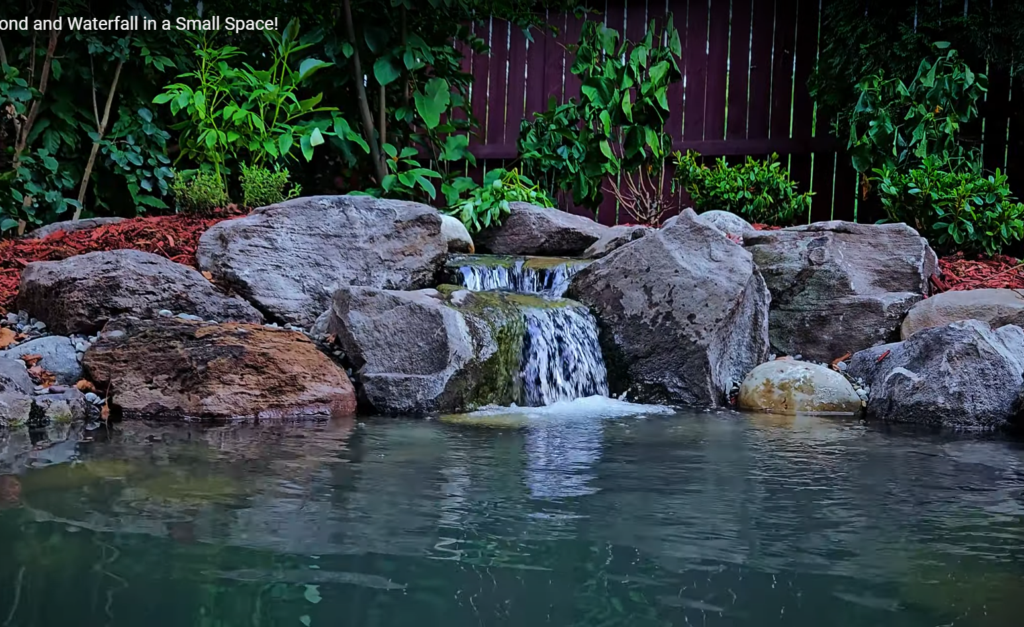
We’ve all imagined having that perfect backyard pond—a peaceful retreat where the sound of trickling water melts away the stress of the day, and the sight of fish and frogs brings you into the present moment. There’s truly nothing like it!
In this guide, we’re diving into the 13 essential steps to building a backyard pond that’s not just functional, but incredibly beautiful. This is for those of you who care about the details. Sure, you can skip a few steps and still end up with a pond—but if you’re like us and want only the best, this is the guide for you.
By the time you finish reading, you’ll have a clear idea of whether you’re ready to tackle this as a DIY project or if hiring a professional pond contractor is the better choice. Either way, we’re sharing all the tools, materials, and insider tricks you’ll need to create a pond that looks like it was built by a pro.
Let’s get started!
Steps
- Layout & Design
- Excavation
- Fish Cave
- Filtration & Circulation
- Liner & Underlayment
- Rocking In the Pond
- Setting Pond Coping Stones
- Lighting
- Waterfall Construction
- Foaming the Waterfall
- Pump Installation
- Pond & Waterfall Edging
- Plants & Plugging In
Tools List
Safety & Protection
- Gloves
- Steel Toe Boots
Digging & Excavation
- Shovel
- Marking Paint
- Digging Bar
- Tamper
- Rake
Transport & Material Handling
- Ball Cart
- 5-Gallon Buckets
- Wheelbarrow
Cutting & Trimming
- Utility Knife
- Wire Clippers (for opening boulder pallets)
- Sawzall
Leveling & Measuring
- Level (Laser level is best!)
- Garden Hose (for marking layouts)
Assembly & Installation
- Mallet
- Large Channel Locks
- Screwdriver
- Nail (for attaching skimmer and filter faceplates)
Materials & Components
Before moving on to installation, make sure you have all the necessary materials and components ready. Here’s what you’ll need:
Filtration & Circulation
- BioFalls – Biological filter that helps maintain clear water.
- Pond Skimmer – Captures leaves and debris before they sink.
- Pond Pump – Keeps water moving and powers your waterfall.
Rock & Liner
- Pennsylvania Boulders – Natural, sturdy rocks for pond edges.
- Delaware River Stone – Smaller stones for finishing touches.
- 45 mil EPDM Liner – Durable, flexible liner to hold water.
- Geotextile Underlayment – Protects the liner from sharp objects.
Plumbing & Sealants
- 25 ft Flex PVC Pipe – Flexible tubing for efficient water flow.
- 2-Inch Plumbing Fittings & Glue – Secure connections for plumbing.
- Waterfall Foam – Seals gaps between rocks for optimal water flow.
- Silicone – for sealing the biofalls and skimmer
- Dual Union Check Valve – Ensures water doesn’t backflow when the pump is off.
Lighting & Aesthetics
- Pond Lights + Lighting Connectors – Enhances beauty and extends pond enjoyment into the evening.
- Plants – Adds natural filtration, oxygen, and a lush, vibrant look.
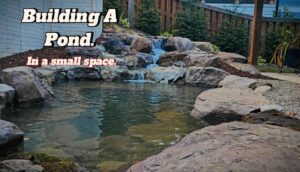
Step 1. Layout and Design – Choosing the Perfect Location
Before breaking ground on your dream pond, it’s important to carefully consider the best spot in your yard. The right placement will ensure you get the most enjoyment and interaction with your water feature. Here are some key factors to think about:
Viewing Points – Where will you be enjoying your pond the most? Consider how it will look from:
- Your outdoor seating areas, like patios and decks
- Inside your home, especially from frequently used rooms
Integration with Existing Spaces – Can your pond be incorporated into an existing patio or garden design to create a seamless flow?
Interaction & Sound – Think about where you’ll spend the most time and whether you’ll be able to hear the peaceful sound of your waterfall from those key areas.
Practical Considerations:
- Is there a nearby hose for easy maintenance?
- Where will you pull power for the pump and lighting?
- How will water drain during heavy rain?
Marking & Refining Your Design
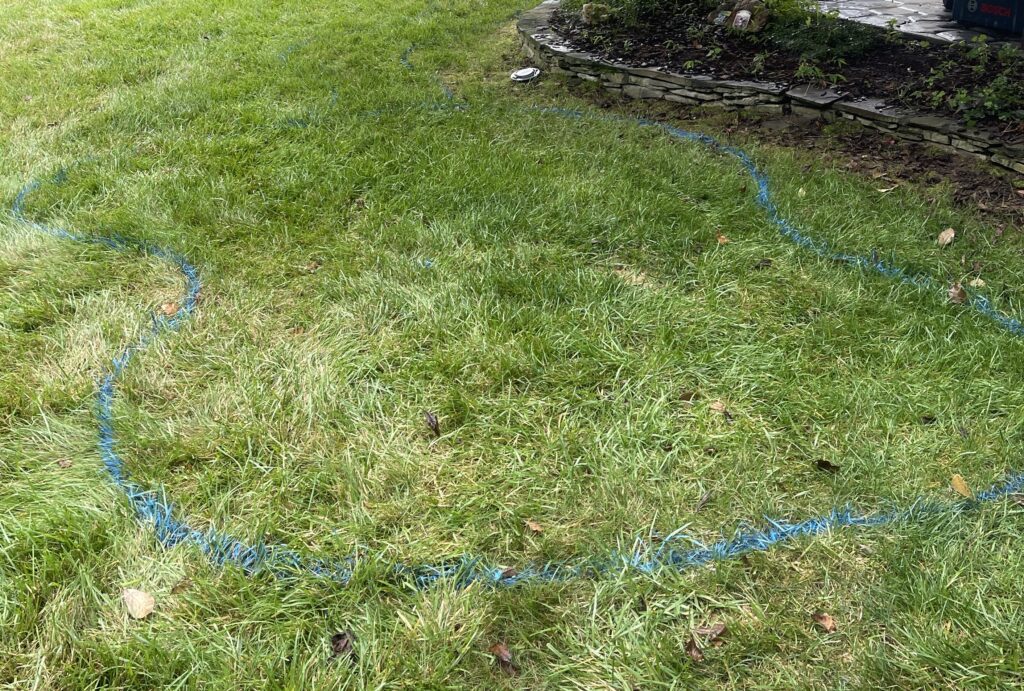
Once you’ve settled on the perfect location, use a rope or garden hose to outline the pond’s shape. Take a step back and view it from multiple angles to ensure it looks great from your most important vantage points.
When you’re happy with the placement, use marking paint to define the exact excavation area. Keep the shape natural and flowing—smooth curves enhance a pond’s beauty and help it blend seamlessly with the landscape.
A well-planned pond not only looks stunning but also creates a peaceful, inviting retreat for you and local wildlife to enjoy for years to come!
Step 2: Excavation – Time to Get Dirty!
Once you’ve finalized your pond shape and marked it out, it’s time to start digging! While we excavate 90% of our ponds with an excavator, hand digging is totally doable—with the right tools and mindset. Here are some key tips to make the job easier:
Digging Tips for a Smooth Excavation
Use a Digging Bar – A shovel alone won’t cut it! A digging bar helps break up tough soil and makes the process much easier.
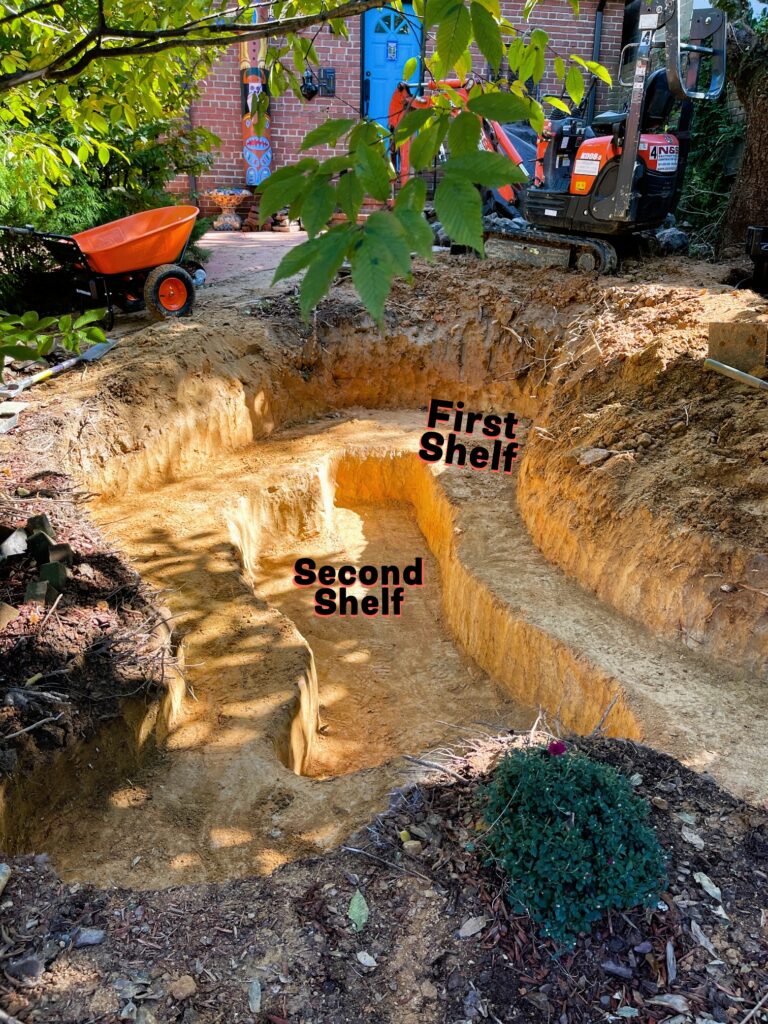
Start with a Small Hole – Dig a small hole down to the depth of your first shelf, then work outward from that hole.
Take Breaks! – Hand digging is hard work—pace yourself and stay hydrated.
Use the Right Tools – A heavy-duty rake, hoe, or chingadera (yes, that’s a real thing!) will help keep your shelves smooth and level.
Why Shelves Matter in a Pond
Excavating with multiple shelves is the best approach. Start by digging the entire pond down to one foot, then mark an area to go another foot or two deeper. If you want an extra deep pond, you can create areas that are 3 to 4 feet deep.
Why are shelves important?
Easier access – Shelves make it safer to step in for cleaning and maintenance. A pond without them can be slippery and difficult to navigate.
Better habitat for fish & plants – Different water depths create the perfect environment for a variety of plants and give fish places to explore.
A more natural, beautiful look – Tiered depths add visual interest and improve the overall design.
Winter survival for fish – In colder months, fish will instinctively swim to the deepest part of the pond where the water stays warmer.
What to Do with All That Dirt?
Digging a pond creates a lot of extra dirt—so plan ahead! Here’s how to make good use of it:
Build the waterfall berm – Use the soil to create height for your waterfall. Just be sure to gradually fan it out so it blends naturally into the landscape (no volcano look!).
Fill in low spots – If you have extra dirt, use it to level out other areas in your yard.
Dispose of excess properly – If you still have more soil than you can use, check for local disposal options or offer it to neighbors who might need it.
Excavation is one of the most physically demanding parts of building a pond, but with the right plan, tools, and mindset, it’s also one of the most rewarding!
Step 3: Adding a Fish Cave
If you’re planning to add fish to your pond, incorporating a fish cave is a must! Fish bring a whole new level of beauty and excitement to a pond, making it a joy for both kids and adults—especially at night when they’re illuminated by pond lighting.
A fish cave provides:
Protection from Predators – Gives fish a safe place to hide if herons, raccoons, or other wildlife come lurking.
Shade & Shelter – Helps fish escape the summer sun and regulate their temperature.
Better Long-Term Survival – Ponds with fish caves have a higher survival rate for koi and goldfish.
How to Build a Fish Cave
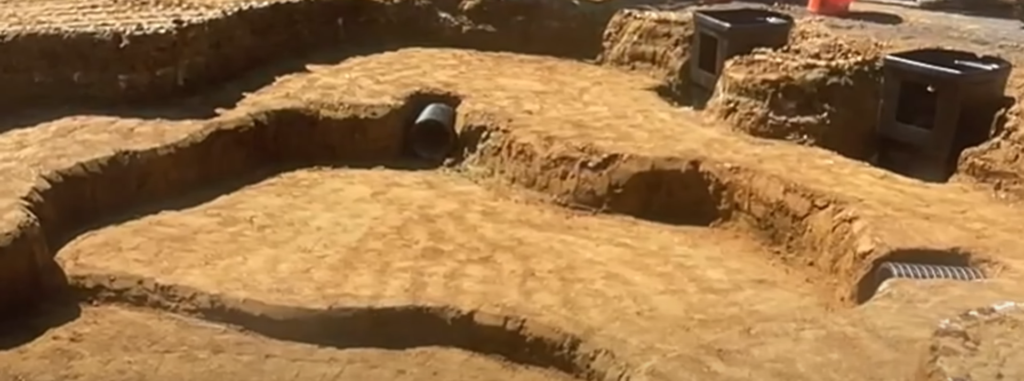
To create a proper hiding spot, we recommend using a 10-inch road pipe:
Dig a recessed area into the pond excavation for the pipe to sit in.
Place the pipe horizontally, ensuring it’s secure and won’t shift over time.
Later you can cover it with boulders and river stone, blending it seamlessly into the pond’s design.
Step 4: Filtration & Circulation
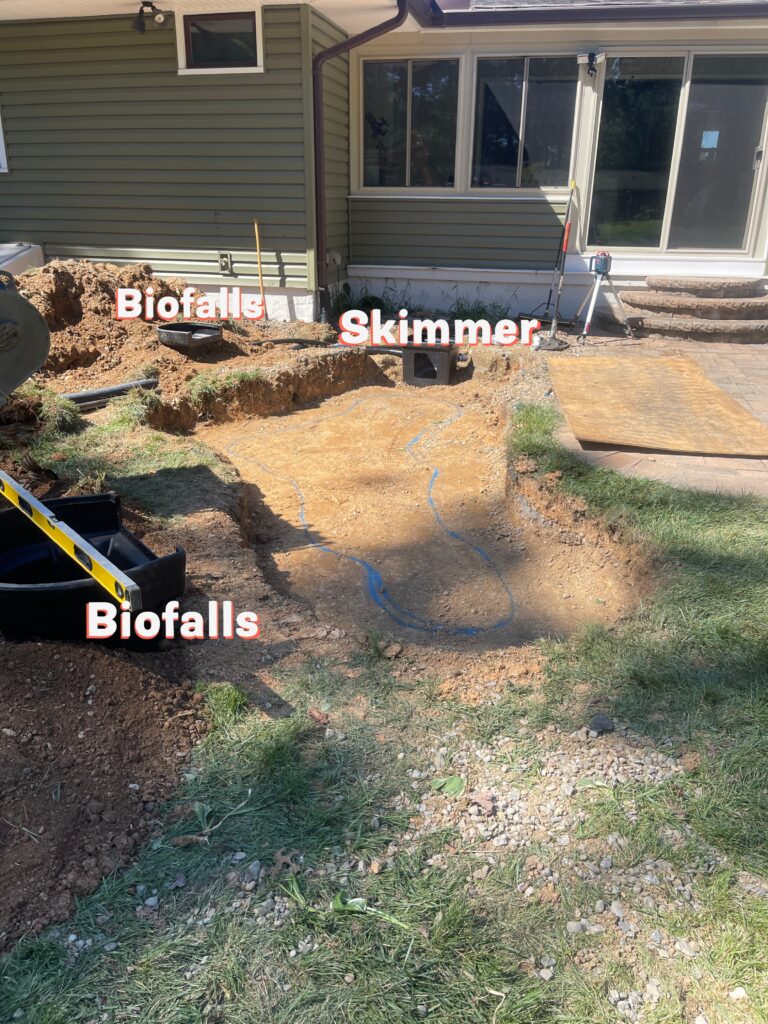
Proper filtration and circulation are the backbone of a healthy, clear pond. This step involves setting up the Skimmer and BioFalls, which work together to remove debris and maintain balanced water quality.
How the Filtration System Works
The Skimmer (Mechanical Filter) – The skimmer removes leaves, pollen, mulch, and other floating debris before it sinks to the bottom.
The BioFalls (Biological Filter) – This provides a home for beneficial bacteria that break down excess nutrients, keeping the water clean and preventing algae growth.
Water Circulation Process
- A pump is installed inside the skimmer, pulling water from the pond.
- Water is pushed through Flex PVC pipe up to the BioFalls.
- As water up-flows through the BioFalls, it is filtered by beneficial bacteria.
- The water spills out, flowing over rocks to create a natural-looking waterfall.
- It zigzags back into the pond, maintaining oxygen levels and water clarity.
Installing the Skimmer – Key Considerations
Placement Matters – Position the skimmer opposite the BioFalls for optimal water movement across the pond.
Water Level Control – The skimmer’s opening determines the maximum pond water level. The top inch of the skimmer opening should match the desired waterline for the best skimming effect.
Use a Laser Level – A laser level makes it easy to ensure proper alignment between the skimmer and water level in the pond. If one isn’t available, a long 2×4 and a level can help check water levels around the excavation.
Installing the BioFalls – What to Keep in Mind
Concealment is Key – Position the BioFalls so it can be hidden naturally with rocks and landscaping. If it sits too high, it will be difficult to disguise and may look unnatural.
Optimize the View – Since the BioFalls is the first (or only) waterfall drop, make sure it’s angled toward the best viewing areas in your yard.
Balance Circulation – Ensure the BioFalls is directly opposite the skimmer for proper water movement throughout the pond.
We suggest running the plumbing line from the skimmer to the biofalls at this time, so that it can be buried during the rest of the construction.
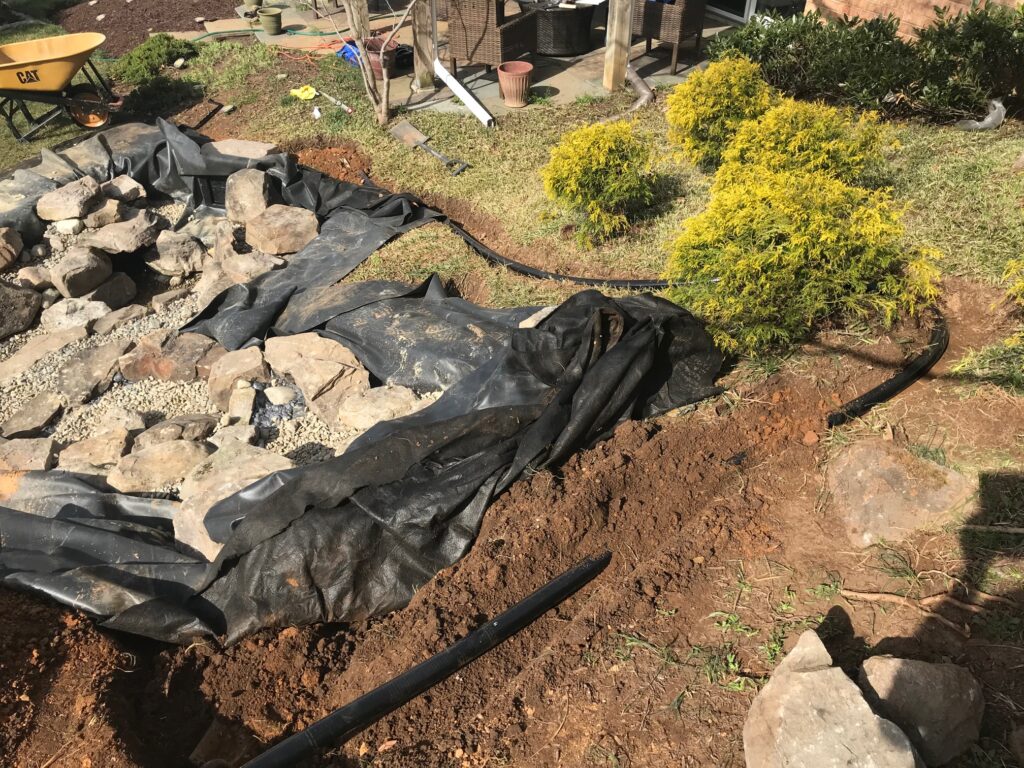
Step 5: Liner & Underlayment

With the excavation complete and your major components in place, it’s time to install the liner and underlayment—two of the most critical elements in ensuring a long-lasting, leak-free pond.
Choosing the Right Liner
We highly recommend using a 45 mil EPDM liner for durability and flexibility. DO NOT go cheap on the liner! Big-box stores like Home Depot and Lowe’s sell thin PVC liners that break down within 1-2 years. If you use one of those, a leak is inevitable—and replacing a liner after your pond is built is no easy task.
Installing the Underlayment & Liner
Step 1: Lay Down the Underlayment
- Use geotextile underlayment as a protective barrier between the soil and the liner.
- If your excavation contains rocks or sharp roots, remove as many as possible.
- For added protection, spread a layer of sand beneath the underlayment.
Step 2: Place the EPDM Liner
- Carefully roll out the 45 mil EPDM liner over the underlayment, ensuring it conforms to the pond shape.
- Minimize wrinkles as much as possible, but allow for natural folds to accommodate movement.
Step 3: Add a Second Layer of Underlayment (Optional but Recommended)
- Placing another layer of underlayment on top of the liner helps protect it from sharp rocks and river stone during the rock placement stage.
How to Properly Size Your Pond Liner
Getting the right liner size is crucial—too small, and you’ll be forced to buy another one; too large, and you’re spending more than necessary. However, it’s always better to be slightly oversized than undersized.
Here’s the formula to calculate liner size:
Liner Length = Pond Length + (2 × Pond Depth) + 2 feet
Liner Width = Pond Width + (2 × Pond Depth) + 2 feet
Example: Sizing a Liner for an 11′ x 16′ Pond with a 2′ Depth
Length: 16′ + (2 × 2′) + 2′ = 22 feet
Width: 11′ + (2 × 2′) + 2′ = 17 feet
Since pond liners come in set roll sizes, you may need to round up to the next available size when ordering.
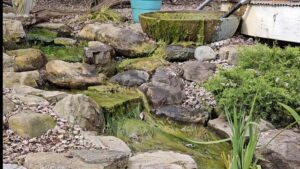
Step 6: Rocking in the Pond
Rocking in the pond is one of the most physically demanding and mentally challenging steps of the build. The goal is to completely cover the liner with a mix of boulders and river stone, creating a natural, visually appealing pond that looks like it was always meant to be there.
Choosing the Right Rock Sizes
For the most natural look, it’s important to use a variety of rock sizes. A pond with rocks that are too uniform in size will start to look manmade.
Boulders: We use Pennsylvania boulders in various sizes—from small hand-set stones to the largest ones you can comfortably move.
River Stone: We recommend Delaware river stone in the following sizes:
- 3/8 inch & ¾ inch – Great for filling gaps and finishing edges.
- 3-5 inch & 5-8 inch – Perfect for stabilizing boulders and adding texture.
How Much Rock Do You Need?
Use this simple formula to estimate your stone needs:
Boulders: (Pond Length × Pond Width) ÷ 40 = Tons of boulders needed
River Stone: Order 30% of your boulder weight in river stone.
Note: These calculations are based on a 2-foot deep pond with hand-set boulders. If you’re using machine-set boulders, the total weight needed will increase.
Moving Heavy Rocks Efficiently
Transporting boulders and river stone is a tough job. Here are some recommended tools to make it easier:
Ball Cart – The best tool for moving large boulders. Unlike a wheelbarrow, a ball cart allows you to roll in heavy boulders. Some ball carts are specially designed for boulder and tree moving.
Wheelbarrow – Works well for transporting medium-sized boulders and larger river stone.
5-Gallon Buckets – Ideal for carrying smaller river stone sizes efficiently.
Step-by-Step: Rocking in Your Pond
Start at the Bottom – Begin placing boulders at the lowest level of the excavation, working around the bottom level of the pond.
Keep Boulders Level – Setting boulders as level as possible will make the pond more stable and visually appealing.
Shim with River Stone – Use 3-5 inch river stone to wedge and stabilize boulders until they sit securely and level.
Backfill Gaps – Any spaces behind boulders should be filled with smaller river stone to lock everything in place.
Finish the Bottom Shelf – Once the first level of boulders is in place, you’re ready to start setting the coping stones that will define the pond’s upper edge.
Step 7: Setting Pond Coping Stones
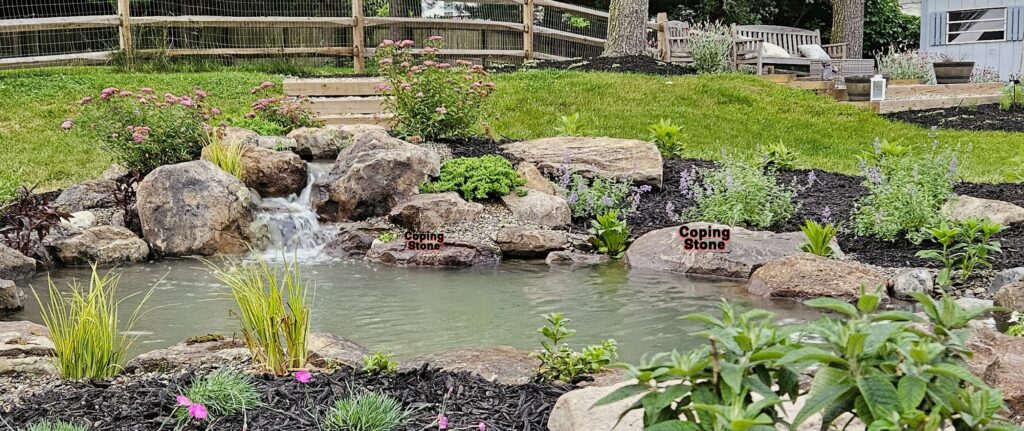
Pond coping stones are the boulders that frame the top of the pond, creating a natural and visually striking edge. Since these stones are the most visible and most interacted with, placing them correctly is key to achieving a seamless, natural design.
The Secret to Great-Looking Coping Stones
Partially Submerged Rocks Look More Natural
- A well-placed coping stone should have its bottom half underwater, with the top portion exposed. This mimics the way rocks naturally settle in a body of water.
Choose Your Best Rocks for the Coping
- Since these stones will be the most noticeable, save your favorite shapes and textures from your boulder pile to use as coping stones.
Vary the Heights & Sizes
- A mix of different-sized boulders and varying heights above the waterline creates a more organic look.
How to Set Coping Stones Properly
Follow the Leveling & Backfilling Process from Step 6
- Just like when placing interior boulders, ensure coping stones are level and stable, using river stone to shim gaps and secure them in place.
Check Water Levels as You Place Each Stone
- Adjust the positioning of each coping stone so that it sits partially in the water. Some should stick out more than others to create a dynamic, natural look.
Avoid visible rock bottoms
- The base of the coping stones should not be visible above the waterline. A well-set coping stone should look as if it has naturally settled into the pond over time.
By taking your time and using an artistic approach, you’ll create beautiful, stable coping stones that enhance both the function and aesthetics of your pond. The more you practice this step, the better your eye for natural stone placement will become!
Step 8: Lighting – Bringing Your Pond to Life at Night

If you’re building a pond without lighting, what are you doing?! (Just kidding… kind of). But seriously, for most pond owners, nighttime is their favorite time to enjoy their pond—and lighting is what makes that experience magical.
Think about it: You’ve wrapped up your day, grabbed a beer or poured yourself a glass of wine, and settled into your favorite chair outside. The soft glow of underwater lights, the dancing reflections on the water, and the shadows of fish gliding beneath the surface create an unmatched sense of relaxation.
If you are worried about your fish needing time in total darkness, don’t be! You don’t have to worry about disturbing your fish—most lighting transformers allow you to set timers, so the lights automatically turn off after a few hours.
How to Light Your Pond Like a Pro
To create the best effect, think about lighting your pond in layers:
Deep Water Lighting – The two-foot-deep section of your pond should have a few strategically placed lights to highlight movement beneath the surface.
Shallow Water Lighting – The one-foot-deep shelf benefits from another set of lights to add depth and dimension.
Waterfall & Stream Lighting – A couple of lights aimed at the waterfall or stream will enhance the movement of the water, creating a mesmerizing nighttime display.
Lighting Placement Tips for a Natural Look
Hide the Light Source – The most professional-looking ponds don’t have visible lights. Instead of placing them in plain sight, nestle lights behind coping stones or under boulders. This creates a soft, natural glow without the distraction of a bright fixture.
Recess Lights Behind Waterfalls – Positioning a light behind a waterfall drop creates an incredible backlit effect. At night, the water will glow as it cascades down, adding to the magic.
Foam Lights into Place – Once you’re happy with the positioning, use waterfall foam to secure the lights. This prevents them from getting knocked out of place over time and ensures they stay aimed in the right direction. After foaming, you can cover the foam with river stone to maintain a completely natural look during the day.
Once you see your fish gliding through the glowing water, you’ll wonder how you ever lived without it!
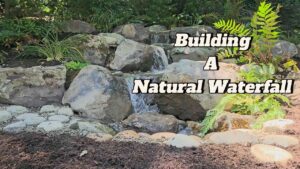
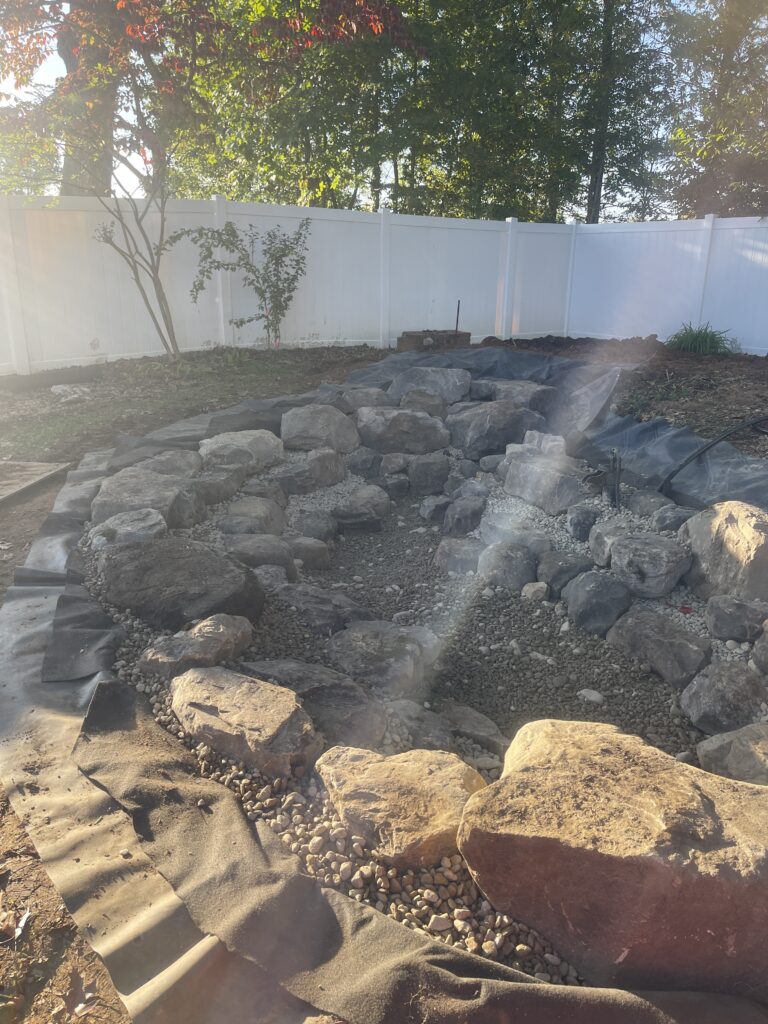
Step 9: Waterfall Construction
Building the waterfall is both the most challenging and most rewarding part of any pond project. This is where you become an artist, shaping the movement of water to mimic the natural beauty of real waterfalls. When done right, it transforms a pond into an absolute showpiece.
Choosing the Right Waterfall Boulders
Just like with coping stones, be sure to set aside your best boulders for the waterfall. We personally hand-select our waterfall stones at the quarry and set them aside until the pond is ready.
Match Boulder Size to the Slope
- Large slope? Use larger boulders for a dramatic, cascading effect.
- Smaller slope or flat area? Use smaller boulders to create more of a meandering stream.
- Vary sizes to maintain a natural, organic look.
The Frame Rock, Weir Stone, Frame Rock Method
To create a visually appealing and natural waterfall, use this proven three-stone technique:
Frame Rocks – These are the two boulders on either side of the waterfall drop. They should be similar in size, with the tops leveled to create symmetry.
Weir Stone – This is the flat stone that the water flows over before falling. It should be recessed slightly behind the frame rocks to create the illusion that the water has eroded the stones over time.
V-Shaped Design – Position the frame rocks at a slight inward angle to create a V shape. This helps guide the water and makes the waterfall look more natural.
How to Make Your Waterfall Look Natural
Avoid the “Bowling Alley Effect”
- A straight-line waterfall with evenly spaced steps looks unnatural. Vary the angles and create movement in the drops to add visual interest.
Keep Your Boulders Level
- Just like in pond construction, shim boulders with river stone to make sure they are stable and level.
- You can tilt some rocks intentionally to create unique water flow patterns, but overall, the structure should feel balanced and stable.
Bury the Bottoms of Your Boulders
- Never leave the bottoms of boulders exposed—burying them slightly makes it look like they’ve been there for centuries rather than just placed there.
Create Multiple Water Flow Directions
- Instead of water flowing straight down in a predictable path, angle some drops sideways or split the flow to make it look more natural.
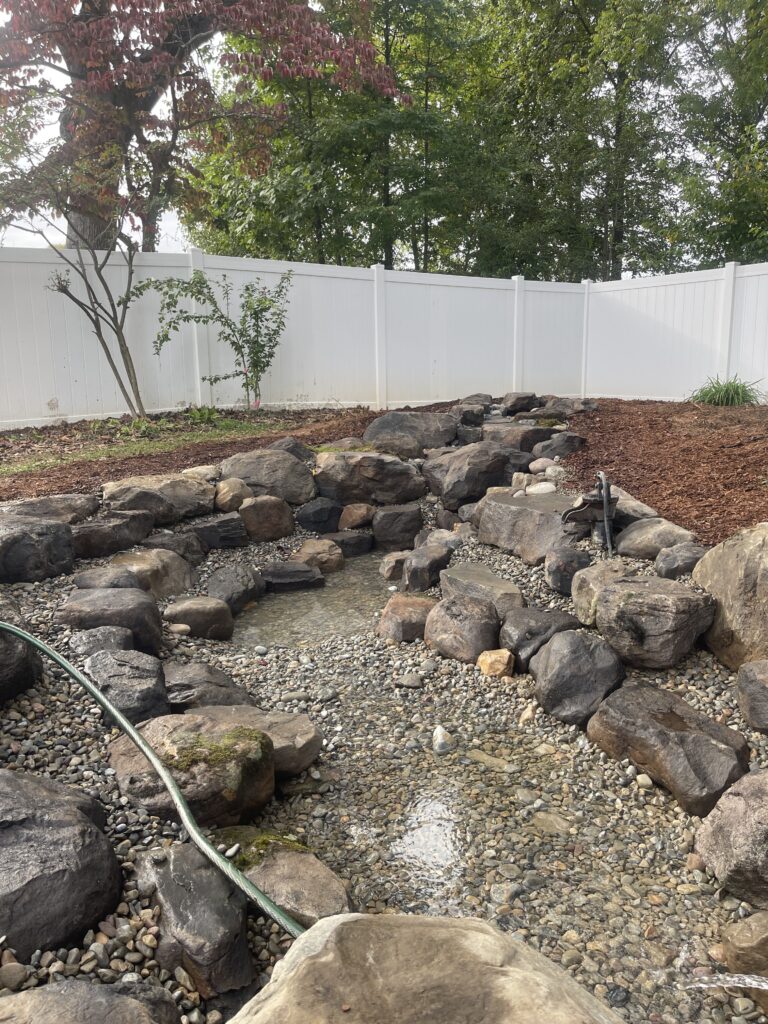
This Works for Pond & Pondless Waterfalls
Whether you’re building a pond waterfall or a pondless waterfall, these principles apply. The key to a stunning water feature is making it look as though Mother Nature carved it herself.
Step 10: Foaming the Waterfall
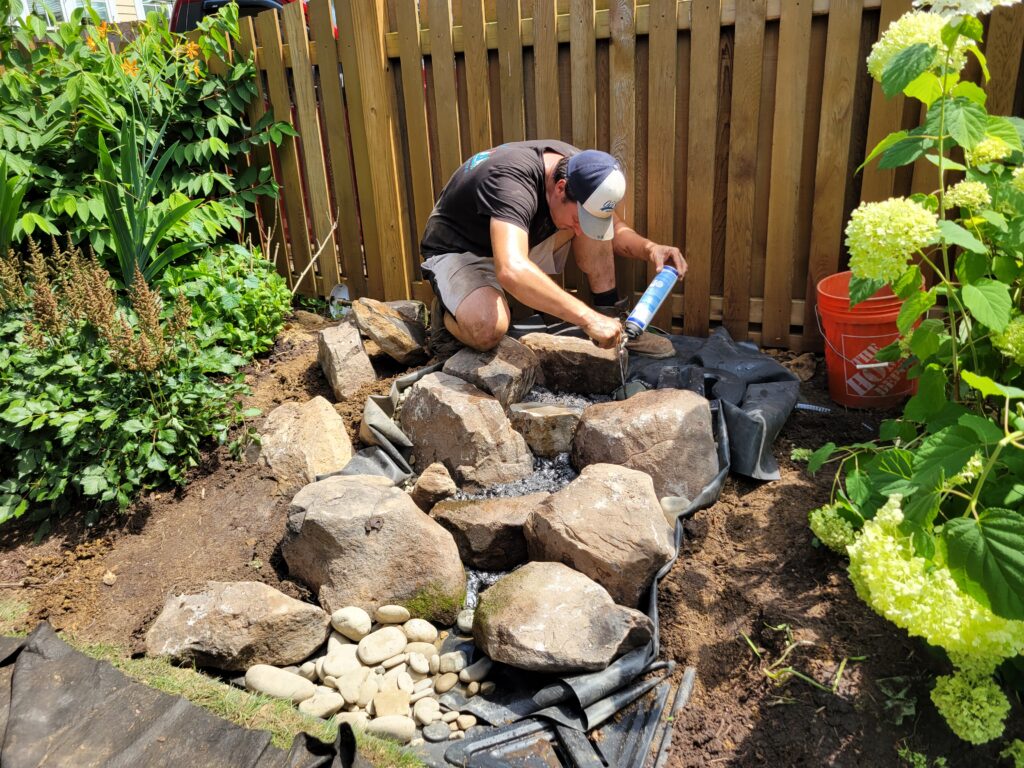
Now that your waterfall rockwork is complete, it’s time to foam it in—a crucial step that ensures water flows exactly where you want it.
What is Waterfall Foam and Why Do You Need It?
Waterfall foam is a black expanding foam designed to seal gaps between rocks, preventing water from disappearing behind your weir stones and frame rocks.
Without it, turning on your waterfall would result in water vanishing into the cracks instead of flowing beautifully over the stones. Foaming creates a watertight seal that keeps the flow visible and dramatic.
How to Properly Apply Waterfall Foam
Step 1: Identify Water Flow Paths
- Before foaming, visualize how you want the water to move over the rocks.
- Look for any gaps or crevices where water could escape.
Step 2: Apply Foam in Key Areas
- Fill in the gaps behind and between the boulders to ensure water flows over the weir stones instead of disappearing beneath them.
Step 3: Test & Adjust
- After the foam has cured, turn on the waterfall and check for leaks.
- If water seeps where it shouldn’t, turn it off, note the problem areas, and add more foam as needed.
Foaming Tips & Tricks for a Natural Look
Wear Gloves! – Waterfall foam is extremely sticky. If it gets on your hands, it won’t come off for days. Always wear gloves when applying it.
Use a Professional Foam Gun – A foam gun allows you to control the flow and store unused foam for later, unlike disposable cans that dry up quickly.
Press Foam Into Place After Partial Curing –
- Wait 3-5 minutes after applying foam. If it feels soft but not sticky, gently press it into gaps.
- If you press too early, you’ll break the seal. If you wait too long, it will harden and become unworkable.
Pro Tip: Disguise the Foam with Sand –
- While the foam is still wet, sprinkle sand over it.
- This prevents your fingers from sticking and helps the foam blend naturally into the rocks.
Step 11: Pump Installation – Bringing Your Pond to Life
After all the hard work of the previous steps, installing the pump will feel like a breeze! This is the final key component that keeps your pond’s water circulating, ensuring a healthy and dynamic ecosystem.
How to Install the Pump in Your Skimmer
Most pond skimmers are designed for easy pump installation, especially if you’re using an Aquascape 1000 skimmer with an Aquascape pump. These systems are built to connect seamlessly, making setup quick and efficient.
Step-by-Step Pump Installation
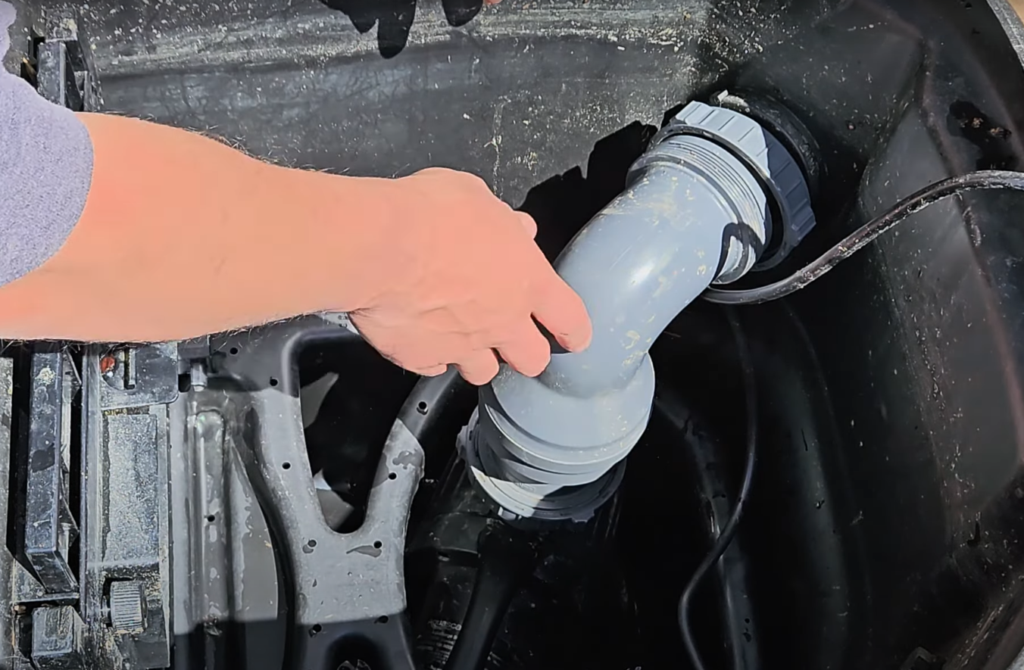
Step 1: Attach the Dual Union Check Valve
- Twist the dual union check valve into the top of the pump. This valve is designed to connect directly to your skimmer’s plumbing line, ensuring a perfect fit.
Step 2: Place the Pump in the Skimmer
- Lower the pump into the bottom of the skimmer and align the check valve with the plumbing line installed earlier.
Step 3: Secure the Connection
- Screw the check valve into place, ensuring a tight and leak-free fit.
Step 4: Assemble the Skimmer Components
- Install the skimmer filter mat first.
- Place the skimmer basket on top to catch debris before it reaches the pump.
Note: While these steps apply to most skimmer setups, slight variations may exist depending on the make and model of your skimmer. Always check your manufacturer’s guidelines for specific instructions.
Pond plumbing is an entire topic of its own, with plenty of custom configurations. We’ll be covering this in a future blog post!
Step 12: Pond & Waterfall Edging
Pond edging is one of the last steps before you can sit back and enjoy your masterpiece! This step is crucial for both aesthetics and functionality—it ensures that all visible liner is hidden, while also preventing low edges that could lead to leaks.
Follow these steps to properly edge your pond and waterfall for a natural, professional finish.
1: Trim the Excess Liner
- Cut off the extra liner around the pond, but leave 3-6 inches more than needed.
- This extra liner acts as a buffer in case the ground settles over time, allowing you to make adjustments if needed.
2: Secure & Backfill the Liner
- Fold the excess liner downward and tuck it against the back of the coping stones.
- Make sure the fold is above the desired water level to prevent leaks.
- While holding the liner in place, have someone backfill with dirt (either from the excavation or topsoil from a garden center).
- Press the dirt firmly against the liner to secure it behind the coping stones, and tamp it down for stability.
- Add enough soil to bring it just below the top ¼ inch of the liner.
3: Foam & Finalize the Edging
- Apply waterfall foam to any cracks between the liner and coping stones.
- This creates a tight seal, allowing you to cover the liner with dirt without it washing into the pond over time.
Repeat these steps around the entire pond and waterfall until all liner is hidden and the pond’s edges blend naturally into the landscape.
At This Point… Your Pond Should Look Amazing!
Once edging is complete, your pond will have a seamless, polished look—with no visible liner and a perfectly natural transition into the surrounding landscape. Now, it’s time for the final step: adding plants and plugging everything in!
Step 13: Plants & Plugging In – Bringing Your Pond to Life
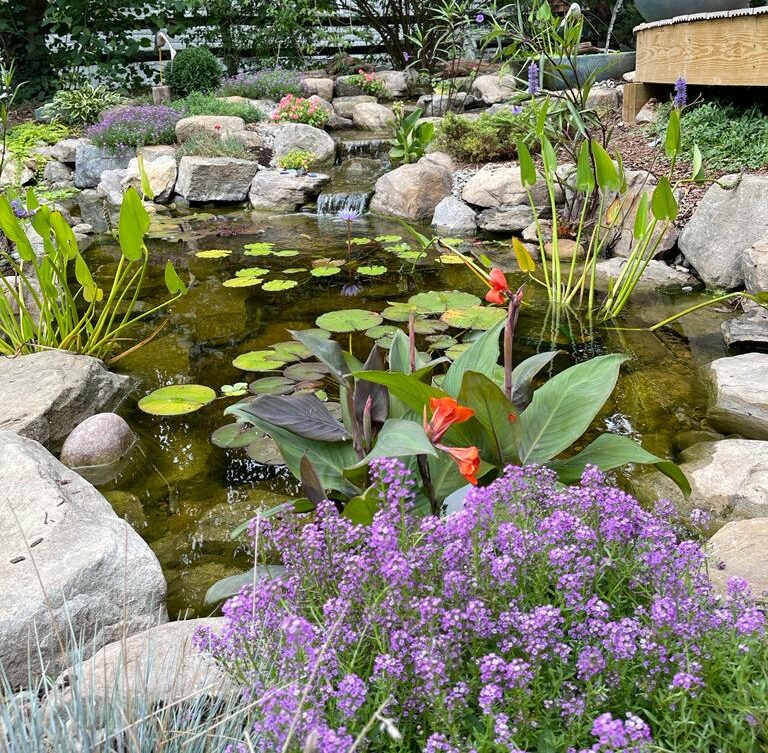
All the hard work is done! Now it’s time for the finishing touches—adding plants and plugging everything in!
While the pond’s structure is essential, plants are what truly bring it to life. They’re the icing on the cake, creating a lush, natural look while also improving water quality.
There’s enough to say about pond plants to fill an entire blog post, but for now, let’s cover the basics.
Choosing & Placing Your Pond Plants
Water Lilies for Depth & Shade
- Start by adding a few water lilies at the bottom of the pond.
- Tropical lilies are highly recommended—even in colder climates—because of their larger flowers and giant lily pads that provide shade and beauty.
Marginal Plants for Edges & Filtration
- Plant marginal aquatic plants around the pond’s edges, tucking them into the river stone.
- These plants blur the transition between land and water, creating a natural look while also absorbing excess nutrients to help keep the pond clean.
Shrubs for Structure & Waterfall Integration
- Select a few key shrubs to frame the pond and define the space.
- Placing shrubs around the waterfall helps scale the waterfall into the landscape, making it feel more natural.
Creating a Cohesive Plant Design
If you’re planning to plant a lot of flowers, consider making a color palette before heading to the nursery. It’s easy to get overwhelmed and start picking random flowers that look nice individually but don’t work cohesively together.
Pro Tip: Google “plant color palettes” for inspiration before you shop!
The Final Step – Plug It In & Enjoy!
Once your plants are in place, it’s finally time to plug in the pump and turn everything on! Watch as water begins to flow, listen to the relaxing sounds, and enjoy the transformation of your backyard into a stunning natural oasis.
We’d Love to Hear From You!
We hope this guide has given you everything you need to build your own EPIC DIY pond. If you tackle this project yourself, let us know how it goes!
And if you’d rather leave it to the pros, we’d love to bring your dream pond to life—reach out to us and let’s make it happen!